If you’ve opened one of the maps and felt a bit lost, you’re not alone. Interactive maps come with their own language, and if nobody’s explained it to you before, it can feel overwhelming. This is a plain English guide, written for anyone using the interactive maps for the first time.
This guide applies to all of the maps – the main Art Trail map, the amenities map, the wheelchair-friendly route, the Advent Trail maps, the Poetry Trail map, and the smaller maps found on some venue access guides. They all work in a similar way, so once you’ve got the hang of one, you’ve got the hang of them all.
Getting past the jargon
Talking about an interactive map brings its own technical language. Here’s what the words mean:

Marker
This is the pin or icon on the map showing where something is. Think of it like a flag stuck in the map to say ‘this is here’. Every venue, bus stop, and toilet on the Art Trail has its own marker.
Clusters
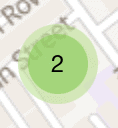
When you zoom out, markers that are close together get bundled into one green circle with a number in it. This prevents the map from becoming cluttered and makes it easier to view and navigate. When you select a circle, the map will zoom in and the markers will separate back into individual markers. If a cluster has more than 10 markers inside it, the circle turns yellow; more than 100, and it turns red.
Base map
This is the background the markers sit on top of, like a street map or a satellite view. If you see a stacked-squares icon, it means you can switch between different styles.
Pop-up
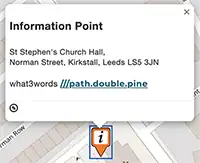
This is the box of information that appears when you select a marker. It could include the address, links, or other useful details.
What the icons mean
Each marker is colour-coded and features an icon or number, so it’s clear at a glance what it represents – a venue marker looks different from a bus stop marker, which looks different from a toilet marker. Exactly which icons appear depends on which map is being viewed, since not every map shows the same things.
Art Trail map

Venues
(yellow, numbered) location of the art trail venues.

Mural trail
(yellow, letter M) locations of murals, public art, and any live mural painting.

KAT letters
(yellow, letters KAT) location of the giant Kirkstall Art Trail letters, part of the mural trail.

Activities
(light orange) locations of activities, workshops, and demonstrations.

Information point
(orange) location of the information point.
Amenities map

Bus stops
(red, bus) location of nearby bus stops.
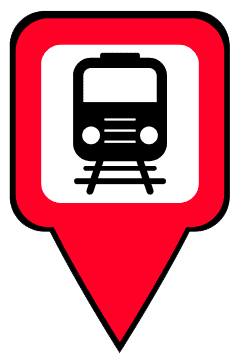
Train stations
(red, train) location of the nearest stations.

Car parks
(blue, letter P) location of car parks.

Blue Badge spaces
(blue, wheelchair) location of Blue Badge spaces.
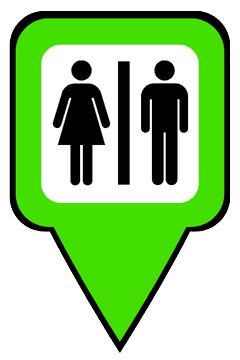
Toilets
(light green) location of toilets.
Other maps

Advent venue
(teal, Santa hat, numbered) used on the Advent map, locations of windows, the date the window is revealed

Advent star
(teal, Santa hat, yellow star) used on the Advent map, location of bonus supporting windows.
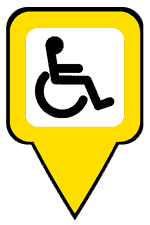
Wheelchair-route
(yellow, wheelchair) used on the wheelchair-route map, location of accessible venues.

Poetry Trail
(teal, numbered) used on the Poetry Trail map, location of the poems.

Directions
(light pink) used on venue maps to mark the start of the journey.
How you find out what a marker means varies a little from map to map.
- On the amenities and Art Trail maps, look for an icon that looks like two squares with pins on it – selecting it opens a panel where you can tick or untick categories to choose which markers appear on the map.
- These maps also have a list of markers, shown to the side of or below the map, with a search bar above it so you can look up a specific place directly. This list reflects whatever’s ticked in the category panel, so turning a category off there also removes it from the list.
- On maps with only one type of marker, such as the Advent Trail map, there’s no category panel or search bar, since there’s nothing to filter – but the list of markers is still there, shown to the side of or below the map.
- The smaller venue access guide maps don’t have a list or key at all, since they usually only show one or two markers – the venue itself and the starting point.
Whichever map you’re looking at, the icon graphic above shows every marker used, so you can always check back here if you’re not sure.
How to use our maps, step by step
- Zoom in and out. Use the + and − buttons (or pinch to zoom on a phone or tablet) to see more or less detail.
- Move around. Click and drag (or swipe) to pan across the map.
- Select a marker. A pop-up box will appear with more information about that spot – tap anywhere else to close it.
- Select a cluster. If you see a coloured circle with a number in it, select it to zoom in and split it into the individual markers grouped inside.
- Show only what you want (where available). Select the markers icon (two squares with pins on them) to bring up the full list of categories on that map. Choose ‘none’ to clear the map, then tick just the categories you’re interested in – handy if you only want to see, for example, toilets or bus stops. Smaller maps, such as individual venue maps, won’t have this option since there’s less to filter.
- Search for a specific place (where available). Use the search bar above the marker list, shown to the side of or below the map, to find a marker by name directly – quicker than scrolling if you already know what you’re looking for.
- Go fullscreen. The fullscreen icon (four arrows pointing to the corners) expands the map to fill your screen for easier viewing. Select it again to shrink it back down.
- Switch map styles. If you see a layers icon (three stacked squares), you can switch between different map backgrounds.
- Reset the map. The home button returns the map to its original zoom and location.
- Using a keyboard? Tab to the map to select it, then use the arrow keys to pan, + and − to zoom, tab to move between markers, enter to open a pop-up, and esc to close it.
If an interactive map isn’t working for you, don’t worry – the main Art Trail map is also available as a downloadable PDF, and paper copies are often available at venues and our information point. Some venue access guides also include their own smaller map to help you find harder-to-spot entrances.
Any questions about the maps, or anything else about visiting Kirkstall Art Trail, contact us using the subject line ‘Interactive maps’.